Food and Recipes

five breads that are easy to make at home

Well, this isn’t quite the content I thought I’d be writing in March 2020. What strange, frightening times we’re living in at the moment.

I live in a small city where not a great deal changes, but nowhere, it seems, is immune to what is going on. Yesterday, I walked (I didn’t dare take the car) to a supermarket a few kilometres away. I was horrified by what I saw. Signs everywhere announcing restrictions on purchases, and that abuse to staff wouldn’t be tolerated (as it shouldn’t be, but it’s sad that people’s conduct necessitates such reminders). Crowds. Trolleys. People grabbing what they could, from bare shelves.

Most confronting of all was seeing an elderly couple, perhaps in their late seventies, with masks on, pushing their trolley together, looking terrified. It was heartbreaking. I got what I’d come for (the upside to taking soy milk in your coffee, it’s always there!) and then had a bit of a cry on the walk home. Fortunately, it had started to rain by then.

Australia is one of the most self-sufficient countries in the world when it comes to food. Nothing was going to completely run out any time soon - it’s because of the panic-buying that stocks have dwindled and the shelves are empty. And the elderly, the disabled, the most vulnerable in our communities - they are the ones suffering. It’s a disgrace.

Yet, at the same time, I understand why people have panicked. If you know something is in short supply, or going to be, it’s natural to want to get as much as you can, so your needs will be taken care of. It’s natural, when everything is so uncertain, to want to control what you can, to feel safe and prepared.

Every day I have to remind myself that the tightness in my chest is anxiety and panic, not the onset of the virus. I work from home 90% of the time anyway, but I am finding myself restless, unable to focus for long periods of time.

In times of stress, I turn to food, in a good way. Reading about it is soothing. Cookbooks have replaced dystopian fiction as my bedtime reading - the latter feels all too real at the moment.

And I love to cook. I can make bread, I can preserve a glut of fresh fruit and vegetables, I can make nourishing and delicious meals from the bare minimum of ingredients. Right now, it feels like those skills are very, very valuable. I am grateful to have them.

I’m also grateful for my vegetable garden which, in early autumn for us here, is still giving us silverbeet, cavolo nero and zucchini like nobody’s business. There’s even a few tomatoes left on the vine. And Tom’s work colleague gave us extra from her garden - rhubarb, carrots, apples, chillies - in exchange for some of my famous apricot and date chutney (recipe coming soon!). So we have plenty. The key is to use it well.

In a bid to be useful, I thought I’d share some cooking from the pantry ideas - as well as any interesting and helpful resources that I stumble upon.

Let’s start with bread.

I’m not surprised that one of the things that’s hardest to find in the supermarkets at the moment is flour. Because if you have flour, you can make countless things, including bread. And making bread is, in my opinion, one of the most useful skills you can ever learn.

And it doesn’t have to be complicated. I love to cook but I absolutely hate getting my hands dirty, getting dough in my fingernails or in my wedding rings, that kind of thing. Therefore, easy breads are the order of the day around here. Preferably no kneading!

These five are my absolute favourite breads to make at home. And perhaps apart from number 4, the flours are interchangeable. Use what you have! It will be slightly different of course but it will still be edible and that’s what matters!

1) Leftover porridge bread

philippa-moore-porridge-bread

I found myself with half a saucepan of porridge leftover from our breakfast last week, when things were still relatively normal. If it were just a spoonful or two, I’d just put it in our compost but it looked like enough for another serve, at least. I abhor waste but cold porridge was not appealing. I seemed to remember reading a recipe for bread you could make with leftover porridge, so I googled it and there it was! The brainchild of Claire Thomson, this bread is absolutely magnificent. Tom and I devoured it. Perfect with butter and jam, or just plain. It’s even nicer if your porridge was made with a hint of cinnamon in it, as ours was!

2) Seedy soda bread

philippa-moore-seedy-soda-bread

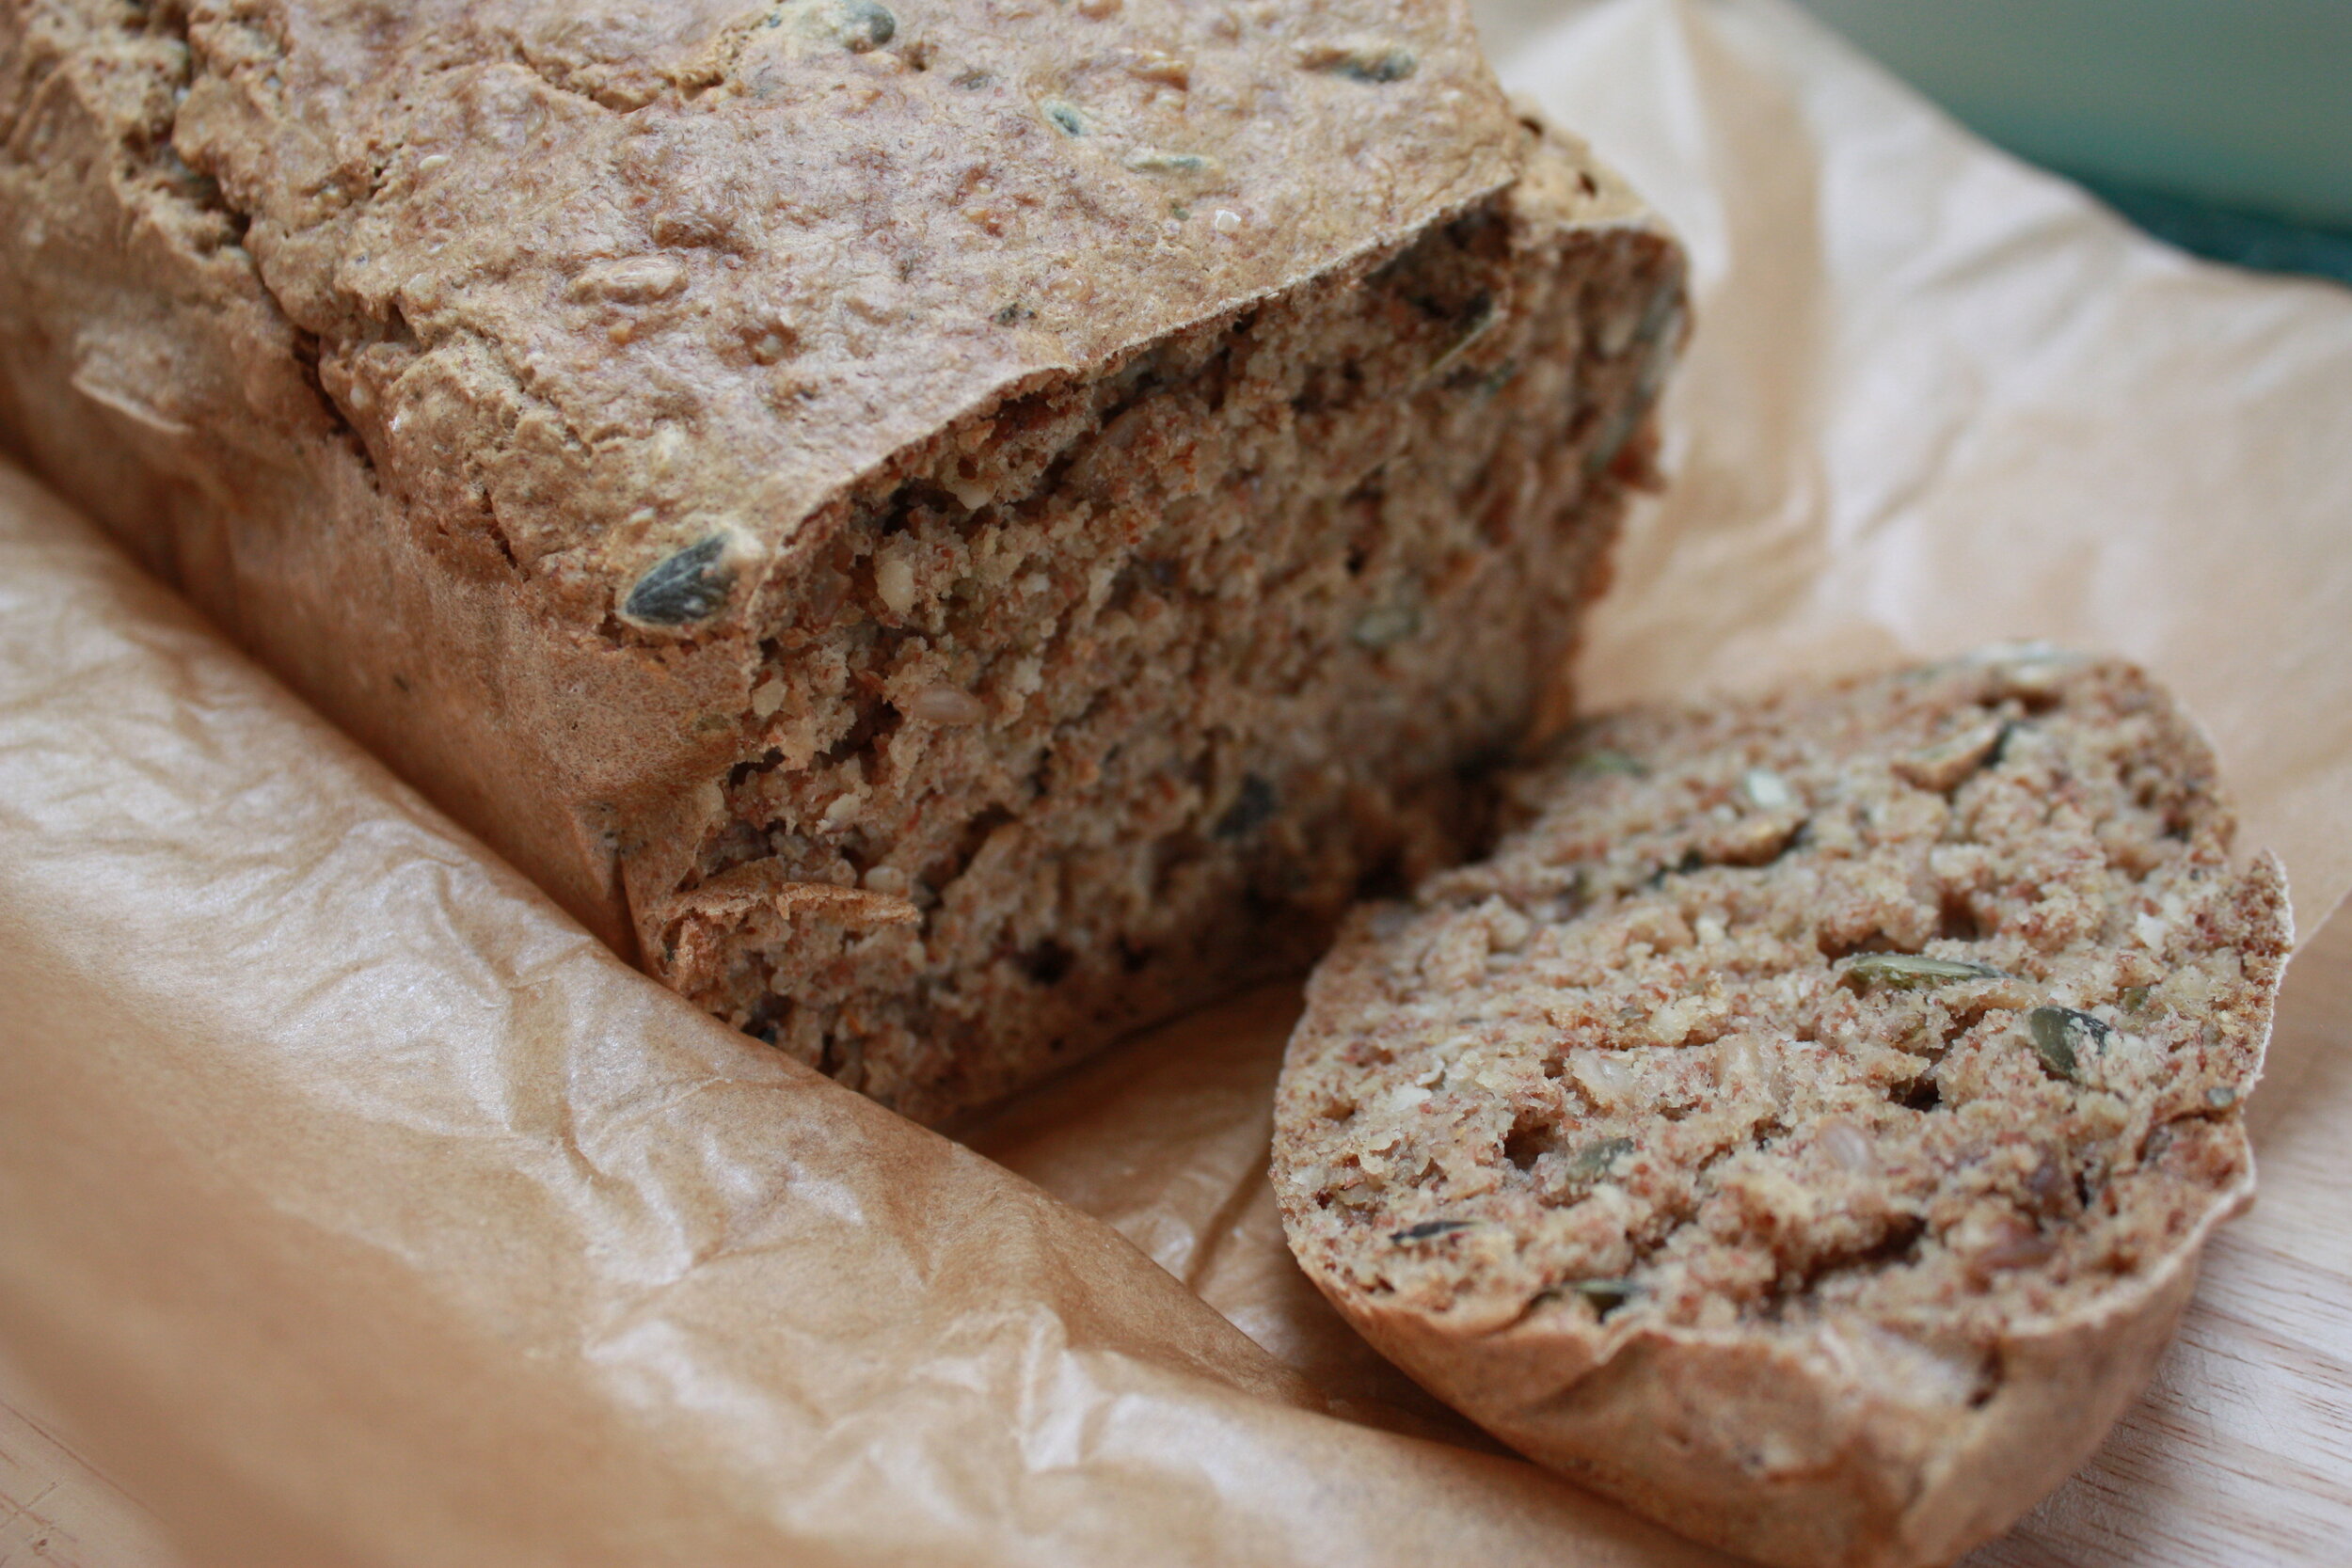
I have been making this bread for years. It’s one of the easiest things in the world to make - I’ve even made it when recovering from the flu. No yeast, the lovely tang of bicarb soda and the goodness of seeds. You can add raisins or sultanas too if you like, but as my husband is averse to dried fruit, I go for all seeds. It’s amazing with ricotta and jam, or just plain.

3) Dutch oven bread

philippa-moore-dutch-oven-bread

Everyone’s heard of this one, surely? There are many recipes from it, including one from the New York Times, but the one I’ve linked to is the one I’ve used the most. Lots of useful tips if you’re a first-timer. This is a bread I make all the time. Again, no kneading involved but just a longer prove so you’ll have to be a bit organised with this one and start it the night before. You can also add some sourdough starter to it if you have some. It tastes like you’ve put way more effort into it than you actually have!

4) Easy gluten-free bread

philippa-moore-gluten-free-bread-avocado-chilli

I don’t make this as often as I used to, as I find gluten-free flour more expensive here in Australia than it was in the UK (or maybe it’s because I still see the £ sign instead of $?) but it’s still a lovely easy loaf to make when you want a GF option. It’s more like making a cake than a loaf of bread, really. And if you have a breadmaker, like I do, there’s practically no labour involved at all!

I love it a day old, toasted, smothered with avocado and chilli, like the picture!

5) Banana bread

philippa-moore-banana-bread

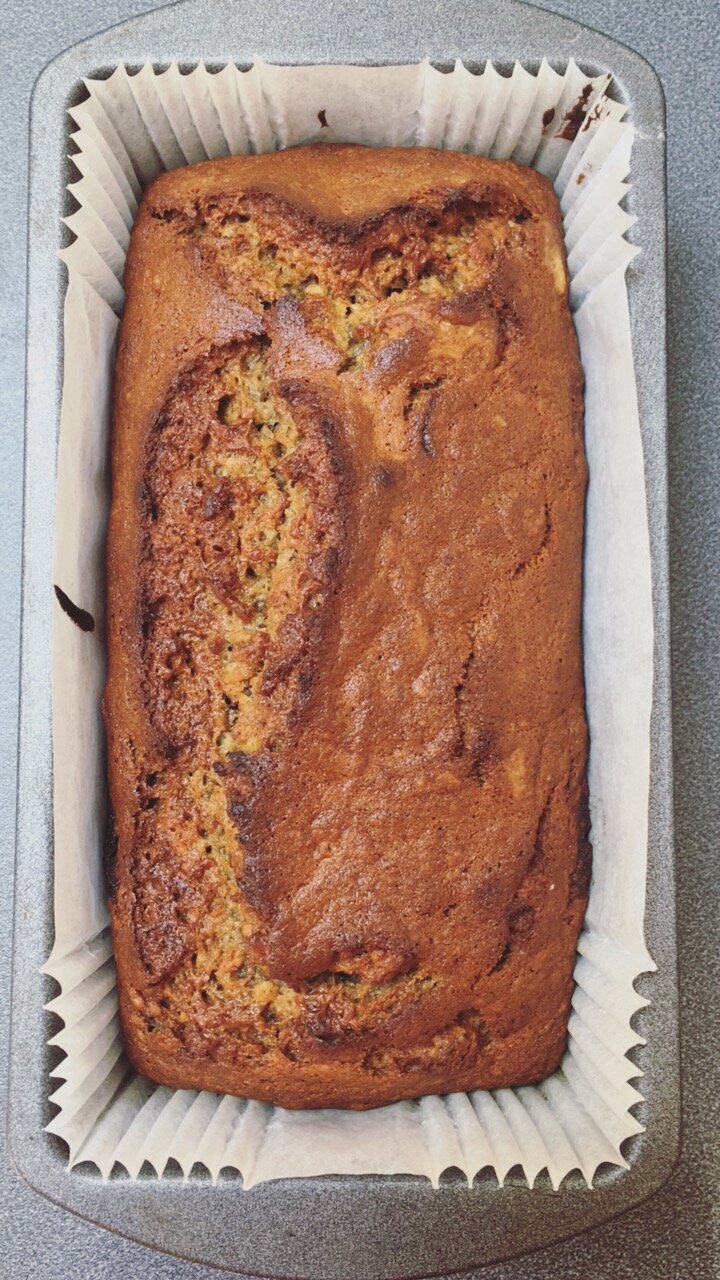
Counts as a bread, surely? If you’ve got lots of bananas to use up at home, look no further. Super easy and absolutely delicious. We all need a sweet treat right now, I think.

I hope you enjoy these and please let me know if you try any of them!

Stay well and hopeful my friends xx

blueberry pancakes for one

blueberry-pancakes-for-one-philippa-moore

For those mornings where it’s just you (or you’re the only one who feels like pancakes), this is the pancake recipe you need! It makes the perfect amount for one - three large pancakes, or five to six smaller ones if you feel like sharing.

You can use any berries you like, or other fruit (slices of banana are nice) or chocolate chips. I put a few halved pecans in with the blueberries on my last pancake when I made a batch, and that was rather tasty. You could even (gasp) leave them plain!

Blueberry pancakes for one

1 large egg
1 cup (250 g) self-raising flour
1 cup (250 ml) milk of your choice (I used almond)
A pinch of sea salt
A pinch of cinnamon or mixed spice (optional)
A few handfuls of fresh or frozen blueberries
Greek yoghurt and honey, to serve

I make the mixture in a large jug, which makes making the pancakes incredibly easy and less messy. As you’re only making enough pancakes for one, there will be plenty of room to whisk everything up. So grab yourself a large jug.

Crack in the egg and whisk briefly to combine the yolk and white. Add the flour, milk, salt and cinnamon (if using) and whisk everything together (I use a small sauce whisk but a fork should work just as well) until combined and smooth.

Get a small non-stick frying pan (I use a 24cm one from Kmart) and spray with cooking spray - you can, of course, put some flavourless oil or butter in, but I find spray works best for pancakes. Place the pan over medium-high heat to get the pan nice and hot. Test if it’s ready by running your fingers briefly under the tap and flicking it at the pan. If it sizzles, you’re ready to make pancakes.

Pour a third of the pancake mixture into the pan and distribute around slightly to get the size/thickness you want. Turn the heat down slightly, not super low but low-ish. Grab a handful of blueberries and scatter over the surface of the uncooked side of the pancake. Leave to cook for a few minutes, until you can see bubbles on the surface of the uncooked side. Sometimes it’s worth having a peek underneath to make sure the other side isn’t getting too brown. I find the trick of having a hot pan to start with but then reducing the heat once you’ve poured the mixture in is very helpful. Flip the pancake over and cook the other side. Press gently on the top to see if it’s cooked - if no raw mixture peeks through, you’re good!

I then place the cooked pancake on the plate I’m going to eat them on and put that in a low oven to keep warm while the rest of them cook.

Cook the remaining mixture as above.

Remove the plate from the oven and serve - I love to eat pancakes with Greek yoghurt and honey, which reminds me of a happy trip to Cyprus Tom and I made some years ago, for our sixth wedding anniversary. Next year is our tenth! Can you believe it?

Enjoy your pancakes, your coffee and your weekend. And if it isn’t the weekend yet, pancakes for breakfast always make you feel like it is.


vegan chilli with chocolate and chia seeds

vegetarian-chilli-philippa-moore

Chocolate and chia seeds? Do those things really belong in a savoury dish?

I am here to tell you they most certainly do!

As we’ve - still - been experiencing bone-chillingly cold nights here in Tassie, comforting and warming meals like chilli are still de rigeur in my household. To this one, I added a couple of squares of 90% dark chocolate (which adds an amazing depth of flavour) and, because there was too much liquid at the end of cooking for my liking, chia seeds. They soak up liquid like magic!! As a result this was probably the healthiest (and most delicious) bowl of chilli I’ve ever eaten.

And though the weather seems to be finally warming up, I won’t be disappointed if I have to make this again any time soon!

What follows is the combination of beans and lentils I used, but you can naturally use any you have to hand.

Vegan chilli with chocolate and chia seeds

1 large onion, finely chopped
2 garlic cloves, finely chopped
1 red chilli, finely chopped
2 large carrots, finely chopped
1 bunch parsley stalks (or a few sticks of celery), finely chopped
1 x 400 g tin black beans, drained and rinsed
1 x 400 g tin kidney beans, drained and rinsed
2 teaspoons Pasillo chilli powder (or any other chilli powder you like - I also like Ancho chilli flakes)
3 teaspoons dried cumin
1 bay leaf
200 g red lentils
1 x 800 g tin whole plum tomatoes
2-3 tablespoons chipotle sauce
2-3 tablespoons tomato paste
2-3 teaspoons vegan “beef-style” stock powder made up with enough boiling water to cover
2-3 squares vegan dark chocolate (I use Lindt 90%)
4-5 tablespoons chia seeds, depending on thickness desired
Salt and pepper to taste
To serve: cooked brown basmati rice, finely sliced spring onions, pickled jalapenos, sharp grated cheddar, greek yoghurt (obviously adding the last two will make it vegetarian rather than vegan)

Heat a splash of olive oil in a large, flameproof casserole dish (I use my Le Creuset) over a medium to high heat and add the onion, garlic and chilli. Saute for a minute or two until soft and fragrant, then add the diced carrots and chopped parsley stalks (I used these because I had them on hand, and they taste remarkably like celery! But use whatever vegetables you have).

Add the drained beans, then the chilli powder, cumin and bay leaf. Toss everything around to get coated in the spices, adding a splash of water if things start sticking. Saute for a few minutes until slightly softened.

Add the lentils, tomatoes, chipotle sauce and tomato paste, stirring to combine everything well. Then add enough “beef” stock to cover the mixture. As lentils absorb so much liquid, I err on the side of caution and sometimes add a bit more liquid than I need. I would rather add chia seeds to soak up the liquid at the end of cooking - adding insufficient liquid in the first place can lead to a rather desperate rescue operation!

Stir well, ensuring nothing is stuck to the bottom of the dish. Allow the mixture to come to the boil and then reduce the heat to low, cover with a lid and cook for 20-25 minutes, until the lentils are soft.

Add the dark chocolate, stirring well to ensure it melts and the flavour is evenly distributed. Add chia seeds at this stage too. You may not need very many, only a tablespoon or so, depending on how much liquid is left. If there is quite a bit, you’ll need to add a few more tablespoons. It’s great fun to watch, these tiny seeds soaking up the stock like magic! You still want some liquid though, so take your time and add judiciously, stirring constantly.

Once the chilli is thickened to your liking, taste and add salt and pepper if you need. Turn off the heat and allow to sit while you assemble all your fixings.

Serve in bowls with rice and topped with whatever you fancy - I love the pickled chillies and jalapenos you can get in jars at the supermarket. This way, I can make the chilli mild enough for heat-averse family members but my portion can be as hot as I like it.

Any leftovers can be frozen or stored in the fridge to reheat the next day, by which time the subtle fruity notes of the dark chocolate will be even more apparent!

silverbeet, ricotta and feta cannelloni

silverbeet-ricotta-feta-cannelloni-philippa-moore

This is vegetarian winter comfort food at its finest. Silverbeet (chard in the UK) is such a nutritious winter vegetable and can be bought readily and cheaply at this time of the year. It goes in everything - pasta sauces, stir-fries, soups, stews, pies, frittatas. This is eating seasonally at its best!

And if fussy eaters in your family sometimes eschew the silverbeet stalks, I promise they’ll barely notice them in this delicious dish. You can use a bechamel sauce to top the pasta rolls instead of passata if you prefer, but I love the acidity and brightness of a tomato-based sauce with this dish. It contrasts so nicely with the creaminess of the cheese and the filling.

This dish has become my standby for winter entertaining, and everyone I’ve served it to has exclaimed with pleasure on taking their first bite. I’m sure you’ll be the same!

It partners well with a rocket salad, steamed green beans, broccoli or any green vegetable on the side - just keep it simple. This dish is the soprano in the mid-week dinner opera.

Silverbeet, ricotta and feta cannelloni

Serves 4-6 depending on appetite

1 onion, finely chopped
3 large cloves garlic, crushed
2 bunches silverbeet (or you can use cavolo nero, kale, spring greens or chard, if you’re in the UK), washed and chopped reasonably finely (stalks and leaves)
Stock or wine, just in case it sticks
1 teaspoon dried mixed herbs or oregano OR a handful of fresh sage and rosemary, finely chopped
1 x 375g tub ricotta
100g (roughly 1/2 a packet) feta
Any other cheese you might have lying around you want to use up (blue cheese is especially good)
1 x 150g tub basil pesto (Coles does a good one)
Zest of 1 lemon, finely grated
A bit of freshly grated nutmeg
Pinch of chilli flakes (optional)
1 x 375g pack fresh lasagna sheets (roughly 12 sheets)
1 x 690g jar tomato passata
1 x 220g tub cherry bocconcini (baby mozzarella balls)
A sprinkling of fresh parmesan (optional)
A little chopped fresh rosemary and oregano to sprinkle over the top
Olive oil
Salt and pepper

Preheat the oven to 200 C. My oven needs to be on 220 to get it to this temperature - you want a hot oven basically!

Heat some olive oil in a large, non-stick pan (which has a lid) over medium-high heat. When hot, add the onion and garlic, and cook for a few minutes until starting to soften. Add the chopped silverbeet and continue to cook, stirring constantly, for a minute or so until it starts cooking. You can then reduce the heat slightly, put the lid on and leave for a few minutes for the stalks to cook and soften. Add some stock, water or wine to the pan if it starts to stick.

Once the silverbeet is cooked, turn off the heat and set the pan aside to cool slightly while you assemble the rest of the filling ingredients.

Add the herbs and ricotta, crumble in the feta, and grate or crumble in any other cheese you wish to use (I find making this is wonderful around Christmas too, when you’ve inevitably got lots of random bits of cheese in the house). The add the tub of pesto, lemon zest, nutmeg, chilli, any other herbs you might like or have lying around (parsley, thyme and basil are all good) and a good cracking of fresh black pepper and a smidge of salt (you won’t need much because of the feta). Mix everything together well.

Assemble a large baking dish (what you’d normally cook a lasagna in), buttering/oiling it if need be. Take each fresh lasagna sheet and place roughly two tablespoons (1/12th) of filling on top, spreading it slightly but keeping it mostly in the middle, then roll up loosely to enclose the filling. Place the rolled cannelloni, seam-side down, in the dish, taking care not to pack them in too tightly. Continue until all the lasagna sheets and filling are used.

Pour the jar of passata over the top, spreading the sauce out evenly. Place the cherry bocconcini evenly on top, to ensure equal cheesiness in each portion! You may not need all of them. Finally, sprinkle the top with a little fresh parmesan (if using) and the chopped fresh herbs.

Place in the hot oven and bake for around 35 minutes (if your oven is temperamental like mine, check after 25 minutes) until the dish is bubbling and the top is golden brown and looking irresistible.

Remove from the oven and allow to cool slightly before dishing out and enjoying, preferably with a glass of excellent red wine alongside. If a Barbaresco is easily available where you are, I highly recommend that. Otherwise, an Australian pinot noir or cab sav is delightful.

peanut butter cookies with chocolate chips and sea salt

peanut-butter-choc-chip-sea-salt-cookies-philippa-moore

I don’t know what it is about the taste of peanut butter, but it has an almost Proustian effect on me.

As a child, I rejected every other sandwich filling for my school lunchbox. In fact, I rejected sandwiches most of the time - they were dull in taste and vomit-inducing in texture, the opposite of everything I wanted and believed food to be. So for most of primary school, my usual lunch was a bag of carrot sticks and peanut butter on crackers. Peanut butter became a familiar, quotidian taste and I found it far from exciting. Once I was old enough to make my own lunch for school, peanut butter was off the menu. I’d had enough to last a lifetime, or so I thought.

But as an adult, I’ve found tasting peanut butter again quite ambrosial. I love it on apple slices, on toast, in stir-fries, in smoothies or even by the spoonful.

Peanut butter also makes a divine and, with the addition of a sprinkle of sea salt, very adult biscuit. But the method is so simple a child could make them (with a little supervision). I find making biscuits such a faff that I was determined to make these in one bowl/pan. Success.

Be warned, these are incredibly addictive.

Peanut butter cookies with chocolate chips and sea salt

150g smooth peanut butter (I like Bega Just Nuts or Pic)
125g unsalted butter
65g rice malt syrup
125g brown sugar
1 egg
Splash of vanilla extract
100g desiccated coconut
270g plain flour
1/2 teaspoon bicarb soda
120g dark chocolate chips
Sea salt flakes, for sprinkling

Preheat oven to 180 C (fan-forced). Line two baking trays with baking paper.

Place the peanut butter, butter and rice malt syrup in a large saucepan (you will use this to make the whole mixture, so make sure it’s a big saucepan) over low heat. Stir occasionally until just melted. Turn off heat.

Add the brown sugar, egg and vanilla, and beat well until combined.

Add the coconut, flour and bicarb soda and stir to combine.

FInally, add the chocolate chips and stir until evenly distributed through the mixture.

Using a teaspoon and your hands, roll into balls of a size to your liking (just be consistent!) and place evenly spaced on the trays. Once all the mixture is used, use a fork to flatten the dough balls slightly.

Sprinkle the tops with a little sea salt (only a little - we’re not going for a hundreds and thousands look! Just a flake will do. Be restrained and judicious here). You could also put a few more choc chips on top (as I did).

Bake in the oven for roughly 8 minutes or until the biscuits are golden brown. For goodness sake set a timer, otherwise you’ll pull a groin muscle running to the oven to rescue them.

Allow to cool slightly on the trays, then transfer to a rack to cool completely. You can eat them warm(ish) but I think they’re at their best cool. They are “crisp yet fluffy”, as Tom described them.

Perfect with a cup of tea or (I imagine) crumbled over some vanilla ice cream.