Food and Recipes

easy baked ricotta

baked ricotta

Ricotta is something I try to have in my fridge at all times. It is perfect for stirring into pasta sauces or risottos, enjoying on toast with pesto or chilli jam, and also makes a super quick and impressive homemade ice cream (which I'll share at some point). One of my favourite ways to enjoy ricotta though is this way - baked with herbs, chilli and lemon. It's SO good.

This makes a wonderful dip for fresh crusty bread, vegetable crudités, oatcakes, crackers or any other dip vehicle you can think of! Lovely as part of a drinks party spread too. 

Easy baked ricotta

1 x 250g tub ricotta cheese
Grated zest of 1 lemon
1 teaspoon mixed herbs (or Herbs de Provence, or any other dried green herb you like)
1-2 teaspoons dried chilli flakes (depending how hot they are and how you like it)
1-2 teaspoons honey
Salt and pepper
A drizzle of olive oil
Fresh herbs such as parsley, thyme or basil, finely chopped, to serve

Preheat the oven to 200 C. Line a baking tray with baking paper.

The ricotta you can buy here in British supermarkets is quite firm, so what I do is unmould the ricotta from the tub on to the baking paper on the tray - if you turn it upside down and squeeze the sides of the tub gently, normally this happens very easily and it just comes away in one piece. It should sit there proudly on the paper. If this doesn't happen, don't despair - as you can see from the picture, mine didn't unmould perfectly but you can always put it together. If the ricotta isn't very firm and just collapses on you, then just scoop it into a few ramekins or a baking dish. As Julia Child would say, never explain, never apologise!

The next step couldn't be easier - sprinkle all the condiments on top of the ricotta with some artistic flourish. Add as much or as little as you like to your taste. The great thing is that all the suggested condiments are interchangeable depending on what you have and what combinations you enjoy - I have some lovely dried herb and chilli mixes I've brought back from trips to Italy and Switzerland, and I find this is an ideal place to use these. 

Once you're happy, drizzle the top lightly with the honey and olive oil. Place in the hot oven for about 20 minutes or until golden.

Let it cool slightly before sprinkling with the fresh herbs (if using) and serve with bread, crackers or another crudite of your choice.

If there are any leftovers, this is wonderful for brunch the next day on toast, or you can stir it into a risotto or pasta sauce.

whisky banana bread

banana bread

If you have any black, spotty overripe bananas in the fruit bowl, you have to make this. Even the most feral bananas, minutes away from going in the compost, are transformed. 

I love this banana bread recipe. It's delicious, indulgent, low in sugar (though you'd never know to taste it) and - best of all - made with the minimum of equipment! Gemma Burgess got me on to the original Smitten Kitchen recipe and I've Phil-ified it a bit over the years to make it as low-fuss as possible. 

It doesn't matter how many bananas you use - I've even just used one, and it was great. Bear in the mind the more bananas you use, the wetter your mixture will be, so if you use 4 bananas, you might need to add a dash more flour to balance things out.

And the shot of whisky? Essential. It's the perfect use for that tiny bottle you got on the aeroplane. A whisky with sweeter notes is what you want here though - something too peaty and smoky like Laphroaig might not work! Alternatively, you can use rum - the darker the better. 

You can of course leave the alcohol out if you're avoiding it or don't like the taste - but the end product may not have the rich depths that the whisky provides. I must admit, I've never tried it without! 

Whisky banana bread

Based on Smitten Kitchen's recipe

2-4 ripe bananas, peeled and broken into chunks
Splash of almond milk (or regular milk)
75g unsalted butter
75-100g brown sugar (I usually use the 75g, depending on how many bananas I have)
1 egg
1 teaspoon vanilla extract
1 shot (30ml) of whisky (I like Highland Park for this recipe - anything with a toffee-sweet finish)
1 teaspoon baking soda
1 teaspoon sea salt
1 teaspoon ground cinnamon
1 teaspoon ground cardamom (or mixed spice)
A little freshly grated nutmeg (optional)
190g plain flour

Preheat the oven to 190 C (350 F). Line a loaf tin with baking paper or a special loaf wrapper like I've used in the picture (you can get them from supermarkets in the baking section). 

Puree the bananas and splash of almond milk together with a hand blender (or in an actual blender) and set aside. Alternatively, smash the bananas thoroughly with a fork if you don't have a blender.

In a large saucepan (which will also be your mixing bowl), melt the butter over a low heat. Once melted, remove from heat and add the pureed bananas, sugar, egg, vanilla and whisky. Mix until well combined.

Add the baking soda, salt, spices and, finally, the flour to the saucepan. Mix well but do not overbeat. 

Pour the mixture into the prepared tin and bake for about 45 minutes or until a skewer comes out clean. My oven is quite hot so I usually check it after 30 minutes. 

Allow to cool and then slice to serve. It's perfect any time of day with tea, coffee....maybe even whisky too. It also freezes well in individual slices if you want to put it in the freezer, away from temptation!

This recipe is so good I sometimes buy a few bananas and deliberately let them get overripe in the bowl, just so I can make this. I'm sure once you've tried it, you'll do the same.
 

tofu mushroom hotpot with miso and chilli

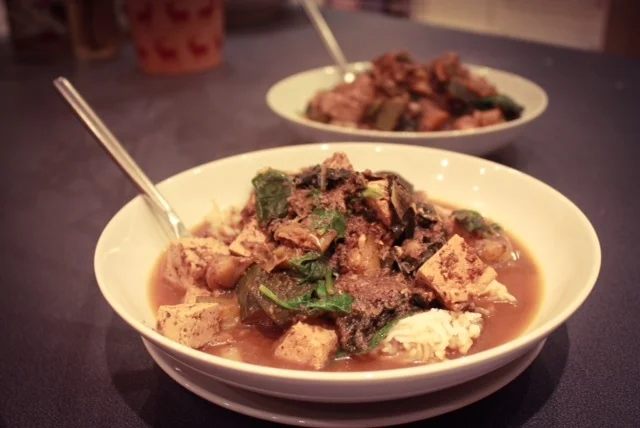
This dish isn't exactly instagrammable (is any brown food?) but if you're after moreish and delicious vegetarian winter comfort food that's also good for you, it doesn't come much better than this! It's also perfect to serve to people who claim they hate mushrooms (aka my husband). Add more chilli, garlic, ginger and miso to your own taste.

tofu-mushroom-chilli-miso-hotpot

TOFU MUSHROOM HOTPOT WITH MISO AND CHILLI

Makes 4 hearty helpings

300g white or chestnut mushrooms

2 cloves garlic

3/4 inch long piece of fresh ginger

3 spring onions

1 x 396g pack firm tofu (preferably organic)

1 tablespoon groundnut oil/coconut oil/chilli oil/garlic oil

2 leeks, washed and sliced

2 medium courgettes, sliced

1 tablespoon minced chilli or chilli paste (I like Gochujang - Korean chilli paste), more if you like it hot

4 tablespoons miso paste (Hikari red or brown is very good, and vegetarian)

850ml vegetable stock

Brown rice vinegar, to taste

Tamari, to taste

Two rough handfuls of spinach leaves

Sesame oil or chilli oil, to serve

Steamed rice, to serve

Pulse mushrooms, garlic, ginger and spring onions in a food processor until it resembles mince. If you don't have a food processor, get one. Or just chop everything finely and set aside :)

Drain the tofu from the packaging, patting off the excess liquid with a paper towel. Cut the block of tofu in half through the middle (as you might cut a sponge cake to prepare it for its filling) and then into roughly 2cm sized cubes. Set aside.

In a large pan, heat the oil over medium heat then add the leeks and courgettes. Cook for a few minutes until they begin to soften (but not colour too much). Add the minced mushroom mixture, increase the heat slightly and stir until combined. Add the minced chilli/chilli paste and miso paste, stir until combined and cook for a minute or two until fragrant. Add a splash of water (or even cooking sherry if you have it handy) if it starts to stick.

Add the tofu pieces, stirring gently to combine, then add the vegetable stock, again stirring gently to ensure everything is mixed in. Bring to the boil, then reduce to a simmer. Cover and simmer for 20 minutes or until everything is cooked through and the broth is flavoursome. Taste it - you may want to add more miso or chilli. A few minutes before you want to eat, add some handfuls of spinach, stir and simmer until the leaves are wilted. Add a splash of brown rice vinegar and/or tamari, to your taste.

Serve in bowls with steamed rice to soak up the delicious broth/sauce. Drizzle each portion with a little bit of sesame or chilli oil.

An excellent savoury muffin

savoury-muffins

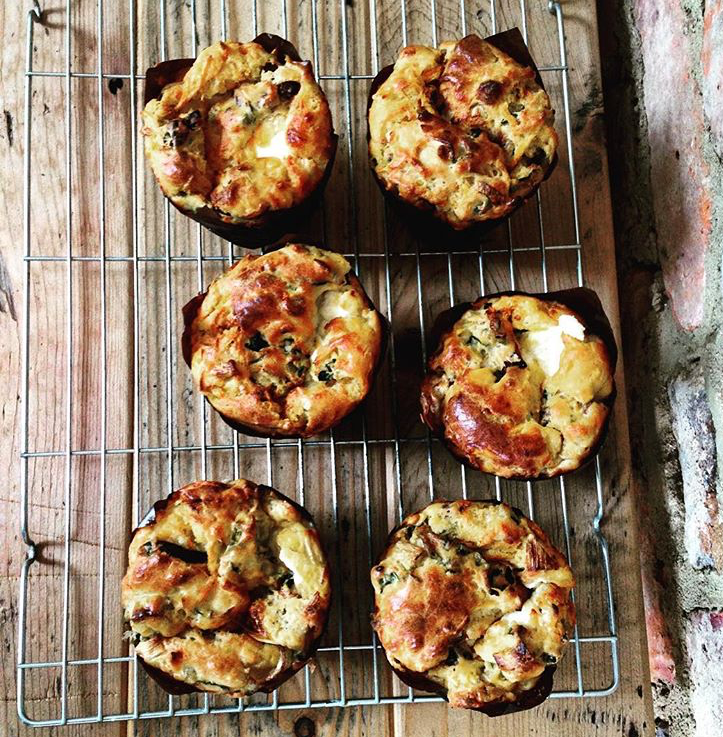
Since my last visit to Australia, I've picked up a rather serious savoury muffin habit. It seems I'm not alone in this, as I encountered many savoury muffin admirers in my homeland - in fact, the woman behind me in a queue in a Melbourne bakery huffed and stomped out when I ordered the last one (hashtag, issues). But it was a bloody good muffin so perhaps she had a point.

SMs aren't really a thing in the UK, I've found. At least, if Miranda Hart's reaction is anything to go by:

But, Miranda, savoury muffins are anything but disappointing! 

This is my foolproof recipe, and I tried a lot of them in my quest to recreate the one I tried in that Melbourne bakery (and inadvertently ruined someone's day over. I hope she recovered).

I highly recommend procuring a kingsize muffin tin and those cute little brown wrappers. They make the job much easier and also you get a giant muffin! But a normal 12 muffin tin will do just as well, they'll just be gone in two bites.

Phil's savoury muffins

Makes 6 Texas-sized muffins, or 12 normal

300ml buttermilk OR 200g natural yoghurt plus 100ml milk (you can also sub creme fraiche for yoghurt)
60ml olive oil (I have used normal and extra virgin, both are good)
1 large egg
1/2 teaspoon bicarbonate of soda
1 teaspoon sea salt
1 teaspoon dry mustard powder
1/2 teaspoon dried herbs of choice (I like basil, oregano or thyme)
200g savoury ingredients (my favourite combination is finely chopped fresh parsley, finely chopped red pepper, cubes of feta and cubes of roasted squash or sweet potato but you could use anything really)
Optional: 6 (or 12) cubes mature cheddar, for a surprise middle

Preheat your oven to 200 C/fan 180 C/Gas Mark 6. Line your muffin tray with paper cases.

Place the buttermilk/yoghurt and milk in a bowl with the oil and egg. Combine together with a fork.

Add the dry ingredients to the wet mixture, stirring well to ensure no dry pockets. Have a light touch and try not to overwork the mixture. It will be a bit lumpy but don't despair, everything's going to be wonderful.

Fold your savoury ingredients in.

Spoon a small smount of mixture into each case, place a cube of cheddar on top of each one, and then cover with remaining mixture. If you're missing out the cheesy middle, just distribute the entire mixture evenly between the cases.

Bake for 25-30 minutes until the muffins are golden brown.

Marvel at your willpower to let them cool in the tin briefly once you remove them from the oven. Then transfer to a wire rack or board to cool. They are lovely eaten warm but I also like them as a portable snack the next day, as the melted cheese will have re-solidified and it's a bit like eating cold pizza, which we all know is one of life's most delectable treats.

I like them with a little butter when warm, but find butter is unnecessary when they're cold. But each to their own.

They freeze well and last up to a week in a tin....so I'm told.


seedy soda bread

philippa-moore-seedy-soda-bread

Feeling seedy? 

If so, I recommend this amazing seeded spelt soda bread. So easy to make, I did it one-handed high on cold and flu drugs!

Seedy soda bread

Based on a recipe in Jordan and Jessica Bourke’s The Guilt-Free Gourmet

475g wholemeal spelt flour OR wholemeal plain flour (or a mixture of both)
1 tsp bicarbonate of soda
1 tsp baking powder
1 tsp sea salt
200g mixed seeds (I use sunflower, pumpkin and linseed)
550ml tepid water

Preheat the oven to 180 C (fan-forced).

Mix all dry ingredients together, then add the water. You can add some maple syrup or molasses if want it to be a sweet bread but I don’t bother! Mix everything until well combined and there are no lumps of flour.

Pour the mixture into a greased and lined 20cm loaf tin and pop into the oven for around 50 minutes (I would start checking it after 45). If it’s brown and a skewer comes out clean, then it’s done!

Allow to cool slightly in the tin and then remove on to a rack to cool. You can slice it when it’s warm, or it lasts for several days and makes excellent toast. If you’ve used sunflower seeds, they will go green (!) but that’s part of the fun and the bread is perfectly safe to eat.